Image courtesy of Scryfall.com
Common Misplays and How to Play It Better
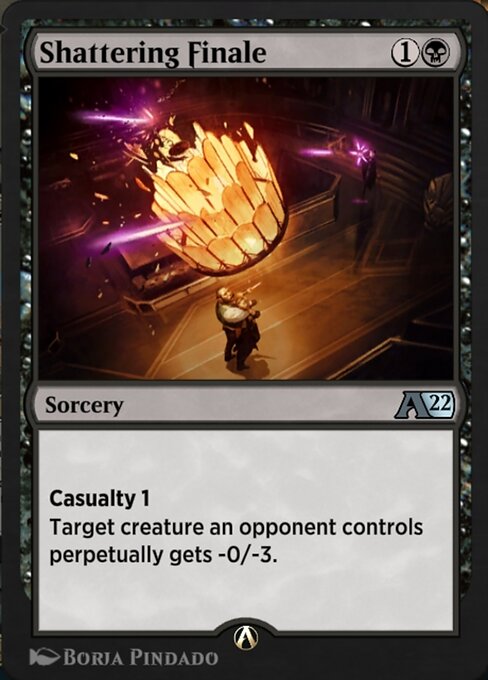
Two mana, single black, a casual hint of tragedy, and a copy-paste of value if you’re willing to sacrifice a creature. That’s the bones of the spell in question, a card from Alchemy: New Capenna thatци players either adore for its subtle power or undervalue for its seemingly simple affect. The effect is deceptively rich: Casualty 1 allows you to sacrifice a creature with power 1 or greater as you cast the spell, copy it, and then you may retarget the copy. On the surface, it’s a clean control tool—yet the real juice comes from knowing when and how to deploy its dual-application capability. 🧙🔥💎⚔️
Misplay #1: Casting without leveraging Casualty when fodder exists
Many players slam this spell down for its immediate -0/-3 on an opponent’s creature and forget the big picture: sacrificing a creature can create a second, independent threat on the stack. If you have a token or a small 1-power creature on board, the Casualty option is not a gimmick—it’s a free extra spell in a single resolution. The misplay is to default to a single instance and miss the second swing. If you’re staring down two or more critical threats, you want both the original spell and its copy to land. The result? You’ve effectively doubled your disruption and forced your opponent into tough decisions about which creature to preserve. 🧙🔥
Misplay #2: Sacrificing your best blocker instead of the expendable fodder
The beauty of Casualty is that you get to pick the sacrifice. The trap is overstating the value of your strongest blocker or most essential creature. The right sacrifice is typically a token, a 1/1, or any creature you’re prepared to momentarily part with in order to unlock the second instance of the spell. If you’re holding a mighty four-power beater that you rely on later in the game, you’ll often regret sacrificing it for the copy. In the late game, you’re often better off using a disposable creature to unlock two potent effects—one on the original target, and one on the copy’s new target. Token strategies and archer-like boards love this approach. 🎲🎯
Misplay #3: Poor target selection for the copy or the original
Remember: the spell targets an opponent’s creature with -0/-3 either way, and the copy lets you choose a new target for its effect. This is where the card shines—if you pick a pair of targets that would have survived a single -0/-3, you’re missing the point. The key is to identify the two threats who are most threatening or most likely to swing the game in your opponent’s next turn. In a one-on-one matchup, you might want to eliminate the opponent’s most dangerous blocker; in multi-player formats, you can spread the pain across several players’ boards. Don’t waste the second bite by choosing a non-threatening target just because you can. ⚔️
Misplay #4: Underestimating the copy’s potential to affect multiple threats in one go
One of the spell’s most satisfying play patterns is to have the original and the copy land on two different creatures in the same moment. That’s two separate -0/-3 debuffs applied to distinct bodies, which can swing combat math dramatically. The pitfall is treating the copy as a “bonus” that you’ll only use when you’re ahead. Instead, lean into it when the board state supports it: if you can drop two threats, or remove a key offensive setup while preserving your own commitment to board presence, you’ll gain tempo that translates into momentum. The moment you let the opportunity slip, your mana and card advantage start to look lopsided. 🧙🔥💎
Misplay #5: Failing to appreciate the permanency of -0/-3
Perpetual debuffs are easy to overlook in the heat of a busy combat phase, but this one sticks around as long as the affected creature remains on the battlefield. That means you’re not just playing a swing spell for this turn—you’re shaping the entire exchange across the next turns. If an opponent can easily replace the dying creature or protect it through recursion, you’ll want to calculate whether the delayed value is worth sacrificing your own board’s potential. This is where patience and tempo become friends: sometimes the best play is to delay, deny, and force your opponent into a suboptimal recasting or blocking choice. 🎨
Misplay #6: Ignoring synergy with broader sacrifice or reanimation themes
Shattering Finale sits nicely in decks that lean into sacrifice payoffs or reanimation engines. If you’ve already committed to a plan built around cheap, expendable creatures, you gain extra leverage by using Casualty to fuel multiple copies across the same turn, then recoup those creatures later via recursion or token generation. The misplay here is to treat it as a stand-alone removal spell rather than a piece of a cohesive strategy. When you see the board state lined up with sacrifice-friendly cards, you should be thinking about how to squeeze two-for-one outcomes out of this spell. 🧙🔥
Practical play patterns to try on the table
- When you’re ahead on board, cast with Casualty if you have a low-cost creature to sac; aim the original at a big threat and use the copy to press a second one. This punishes top-deck reliance and buys you critical turns. ⚔️
- If you’re behind, consider casting normally if you lack a suitable sacrifice creature; the spell still provides solid tempo by lowering a threatening opponent’s creature’s resilience. 💎
- In a multiplayer skirmish, choose two high-leverage targets for the original and the copy, ideally ones with synergy or multiple opponents depending on the board state. The more you maximize the two-target potential, the more your opponents must react. 🎲
- Seed your deck with expendable creatures or tokens so you can always pop Casualty when the moment demands it—this preserves flexibility for future turns and keeps your options open. 🧙🔥
Design, flavor, and the card’s place in Alchemy: New Capenna
Shattering Finale embodies the Alchemy: New Capenna vibe—snappy, kitchen-sink strategic decisions wrapped in a noir-drenched cityscape where every resource is a potential trap. The Casualty mechanic is borrowed from other sets in Mardu and black-centered builds, but here it’s tuned to the digital arena, where the copy resolves with a satisfying flicker of control on the stack. The card’s art by Borja Pindado complements its ruthlessly efficient effect, and the uncommon slot makes it a welcome addition to sealed or constructed Alchemy decks alike. The digital-only format ensures that players can experiment with casualty interactions without traditional paper constraints, and the option to leverage a second copy in the same resolution adds a layer of tactical depth that’s perfect for streaming and puzzle-solving with friends. 🧙🔥🎨
Deck-building notes and meta perspective
As a two-mana black spell with a built-in copy, this card scales with how you manage your board state. It rewards players who lean into creature-based sacrifice themes, tokens, or relentless pressure on the frontline. In Arena-centric play, you’ll see it swing turn position during midgame, especially when the opponent anticipates you casting a removal spell and is unprepared for a second, differently targeted debuff. In multi-player formats, the ability to spread the -0/-3 across multiple creatures can be a decisive war-winning move when timed correctly. The card’s Uncommon rarity and digital availability make it a clever pick for budget-friendly, function-first builds that nonetheless punch above their weight. 🧙🔥💎
For fans who love mixing strategic card play with a pinch of brutality, this spell offers a perfect blend of control, tempo, and resource management. If you’re looking to explore similar synergies, you’ll find that Shattering Finale pairs well with sacrifice outlets, token producers, and recursion engines that keep your pressure constant while you sculpt the battlefield to your advantage. And if you’re hunting a few new accessories to sharpen your game night, you can browse a practical companion item below—the next turn could depend on keeping your hands calm and your plans sharp. 🎲