Image courtesy of Scryfall.com
Harnessing the Beast: Spiritmonger Combos for Turning Its Trigger into Massive Wins
There’s something delightfully ruthless about Spiritmonger. For a five-mana liege in a BG shell from Dominaria Remastered, this 6/6 Beast isn’t just a behemoth on the battlefield—it’s a self-improvement engine. Every time this creature deals damage to a creature, it mercifully hands you a +1/+1 counter on itself. That simple line of text becomes the engine for a web of interactions that can snowball into real-value board states 🧙🔥💎⚔️. And yes, we’re talking about actual, replicable game plans you can build around in Commander or other multi-player formats where Spiritmonger can shine. Let’s dive into how to engineer a deck that turns Spiritmonger’s trigger into giant, late-game wins while keeping the flavor intact and the board under your control 🎨🎲.
Understanding Spiritmonger at a Glance
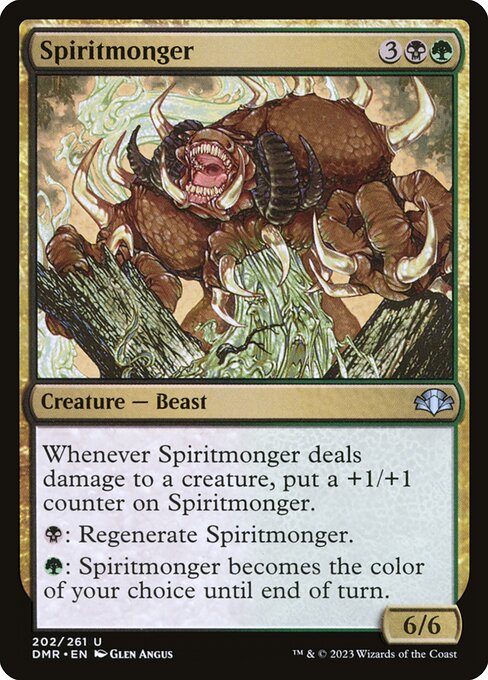
First, a quick refresher on the card’s toolkit. Spiritmonger is a blue-green-black({B}{G}) Creature — Beast with a base stat line of 6/6 and a mana cost of {3}{B}{G}. Its key abilities are deceptively simple but deeply potent: whenever it deals damage to a creature, you put a +1/+1 counter on Spiritmonger. It also has regeneration for a single Black mana and a green "become color of your choice until end of turn" ability, which opens up some shrewd play opportunities. In Dominaria Remastered, this uncommon card gets a chance to shine again, especially in a well-supported BG shell where removal is scarce enough to let it grow unimpeded. The card’s compact mana cost and immediate payoff make it perfect for a midrange-to-leaning combo arc, where incremental growth compounds into a blowout finish 🧙🔥.
Core Strategy: Build-In Counters, Build-Out Wins
All the best Spiritmonger decks center around one core idea: maximize each damage event so it drops more counters on Spiritmonger, then pressure opponents with a big, armored threat. The trick is to choose the right enablers and finishers that both protect Spiritmonger and escalate its growth without giving opponents an easy out. Below are the pivotal threads you can weave into a cohesive plan.
- Counter-doublers: Cards like Doubling Season or Primal Vigor turn a single damage-trigger into multiple counters for Spiritmonger. If a single encounter with a creature allows one counter, these effects can turn that into two per event, then four, then eight—quickly pushing Spiritmonger from a sturdy behemoth into a mountain of churning power. This isn’t just math; it skews combat decisions by forcing blockers to tap out or be sacrificed to prevent an overwhelming swing 🧙🔥.
- Repeatable damage sources: Use ways to keep Spiritmonger dealing damage to creatures across turns. Combat damage from an attack is the obvious route, but you can supplement with efficient creature-based damage or damage-based removal to trigger more events. The more times Spiritmonger triggers, the more counters accumulate, compounding your pressure every time a new creature enters or a blocker bites the dust.
- Protection and resilience: Regeneration via the {B} cost keeps Spiritmonger on the battlefield longer, letting you weather sweepers and mass removal. The green ability to become any color for a turn can blunt targeted removal by enabling you to swing through with tricky timing or to dodge color-based hate for a crucial turn.
- Finisher options: Once Spiritmonger has accumulated a healthy stack of +1/+1 counters, you can close out with a big-finisher plan. Pump spells, anthem effects, or a well-timed combat trick can push Spiritmonger over the edge—especially if you have one or two other creatures feeding into the same board state. The idea is to ride the counters into a decisive attack where blockers are overwhelmed, and the table can’t answer the board state you’ve built.
Three Practical Combos You Can Start Testing Today
- Counter Doubling Shuffle — Spiritmonger + Doubling Season (or Primal Vigor) on the battlefield. When Spiritmonger deals damage to a creature, it would normally place one counter. With doubling effects, you push two counters per event (and even more if you’ve layered multiple doublers). Over a few turns, a handful of combat damage events becomes a towering 6/6 becoming a 12/12, then 24/24 with the right pump spells backing it. Your plan is to ride a single, well-timed attack to break through with lethal or near-lethal damage after accruing counters. Expect draw-dense decks to help you find these enablers consistently 🧙🔥💎.
- Recurring Growth Engine — Pair Spiritmonger with a simple reanimation or recursion suite (e.g., animate/dead style effects plus a way to re-cast Spiritmonger after it’s dealt with). Each time it re-enters and deals damage again, the trigger fires and your counter pool starts climbing anew. You don’t need an infinite loop for this to feel explosive; a couple of clean recursions can yield a multi-turn race where you outsize opponents before they can assemble an answer.
- Color-Turn Finisher — Utilize Spiritmonger’s {G} ability to turn it into any color for a turn, enabling a surprise answer to problematic removal or a last-minute aura/equipment threat. In a pinch, a well-timed color switch can swing combat in your favor, allowing Spiritmonger to land damage through a protected line, accumulate counters, and push toward a final blow with a pumped board state. The flavor here is as much about timing and misdirection as it is about raw power 🧙🔥.
Deck-Building Considerations
- Color identity and shell: A BG shell plays to Spiritmonger’s strengths—free regeneration via black, plus green’s ramp and color-shift versatility. Keep your mana base lean enough to cast Spiritmonger by turn five while having enough fixating lands and accelerants to hit your critical thresholds.
- Protection and resilience: The board should have answers to mass removal but also ways to protect Spiritmonger from doom cards. A lean suite of targeted removal, combined with regenerators and a handful of fetch/shuffle effects, keeps the engine running.
- Finisher density: Don’t rely solely on Spiritmonger. Include a few go-tos to pressure the opponent when Spiritmonger is large, such as pump spells, anthem effects, and efficient combat tricks. The goal is to convert counters into decisive action across a single swinging turn or a rapid sequence of turns.
- Recursion and payoff: A measured amount of recursion—reanimates, tutors, and flexible card draw—keeps you from stalling out when opponents disrupt your plan. The most satisfying games are the ones where your engine keeps ticking from early to late game.
“Spiritmonger isn’t just a big body; it’s a growth engine that rewards patient planning and precise application of buffs. When you sequence damage events with the right enablers, you’re not just hitting hard—you’re snowballing through the game.”
If you’re looking to bring this concept from theory into practice, the right accessories and play space can help you get there. And if you’re exploring cross-promotional good vibes while you craft a BG ramp deck, consider this product as part of your browsing journey—a little something to keep your setup sharp and your tech slick: Biodegradable Eco Phone Skin Vegan Paper Leather Back Sticker. It’s the kind of practical, planet-friendly touch that pairs well with the meticulous care you put into your games 🎲🎨.
Ready to test these lines in your next session? Sharpen the edges with a few thoughtful upgrades, and you’ll find Spiritmonger turning its trigger into an avalanche of value. The Dominaria Remastered print captures it all in a single card—an uncommon gem that invites you to lean into the long game and savor the aftermath of every damaging exchange ⚔️.